Connect your AI agent to ExperiOps.
Let Claude, ChatGPT, or any MCP-compatible agent manage your ExperiOps projects.
ExperiOps provides an MCP (Model Context Protocol) server that lets AI agents help you create, fill in, and submit projects for you.
Questions? Email us at [email protected].
https://experiops.com/mcp/
Paste this address into your AI agent's MCP settings as described below.
Pick your AI assistant below and follow the steps. The whole thing takes about a minute, and you can disconnect at any time.
-
Log in to Claude and navigate to the Connectors page.
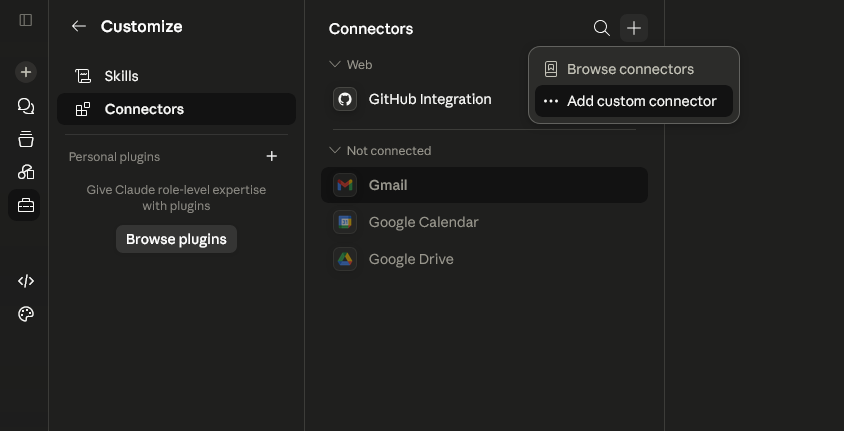
Claude's Connector page with the "Add custom connector" button visible -
Click + then Add custom connector, name it "ExperiOps", paste the connection address from above into the Remote MCP server URL field, and click Add (leave the other fields blank).
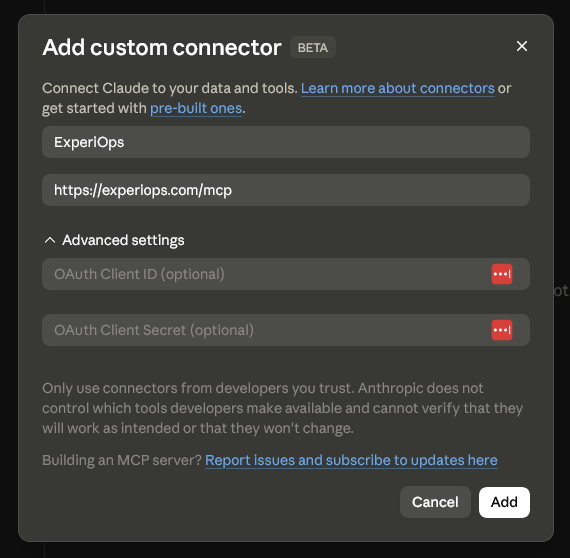
Claude's "Add custom connector" window with the address pasted in -
Claude may ask you to connect to ExperiOps. Click Connect.
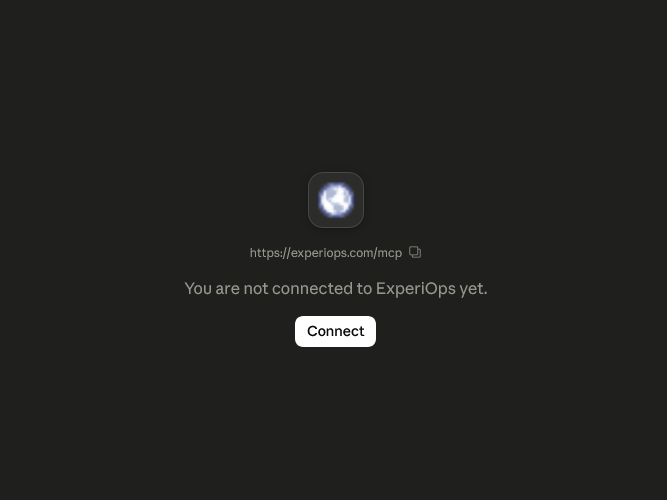
Claude asking you to connect to ExperiOps -
A page from ExperiOps will open asking you to log in and give your approval. Click Authorize.
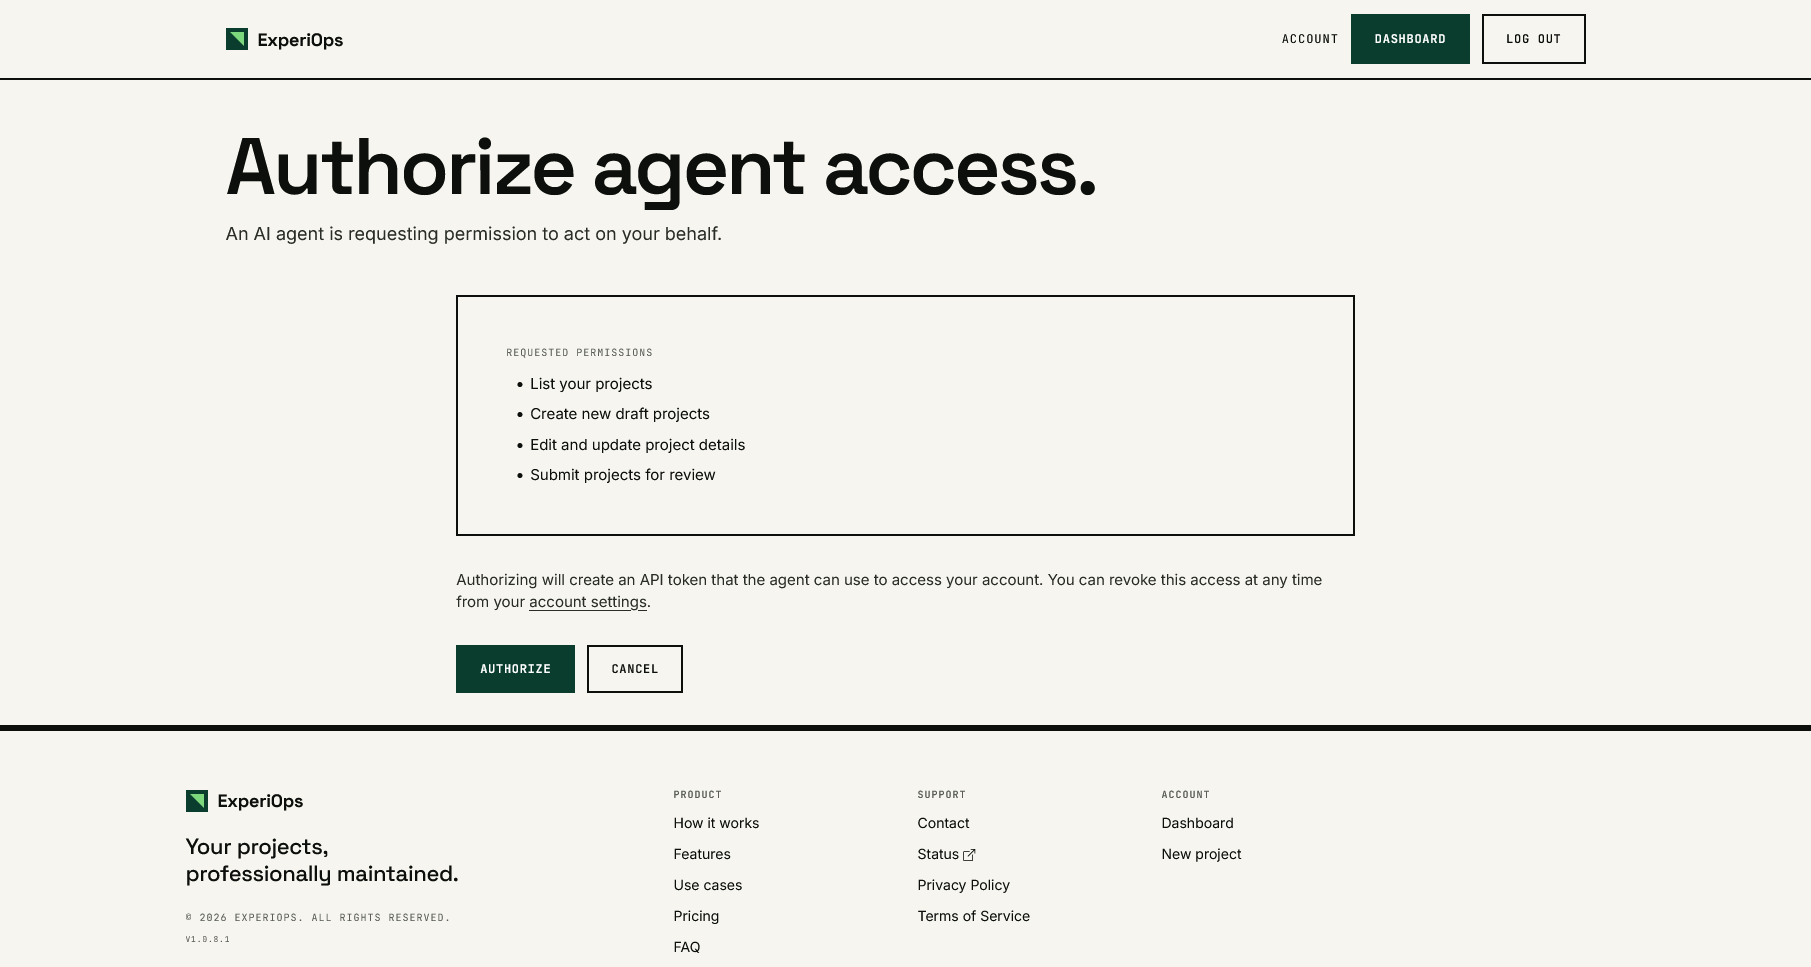
The ExperiOps approval page - That's it! In any chat, you can now say things like "Submit the project we've been working on to ExperiOps" and Claude will take care of the rest!
Need more help? See Anthropic's guide: Get started with custom connectors.
MCP for ChatGPT is currently in beta and only available to some users.
-
Log into chatgpt.com in your browser and navigate to Settings --> Apps. Click on Advanced settings.
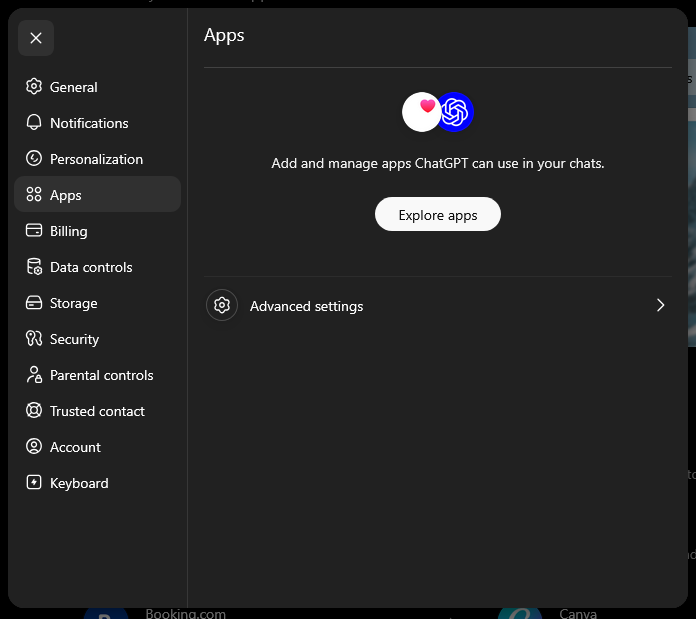
ChatGPT's settings window opened on the "Apps" page -
On the new page enable Developer mode. A Create app button will appear at the top of the page. Click it.
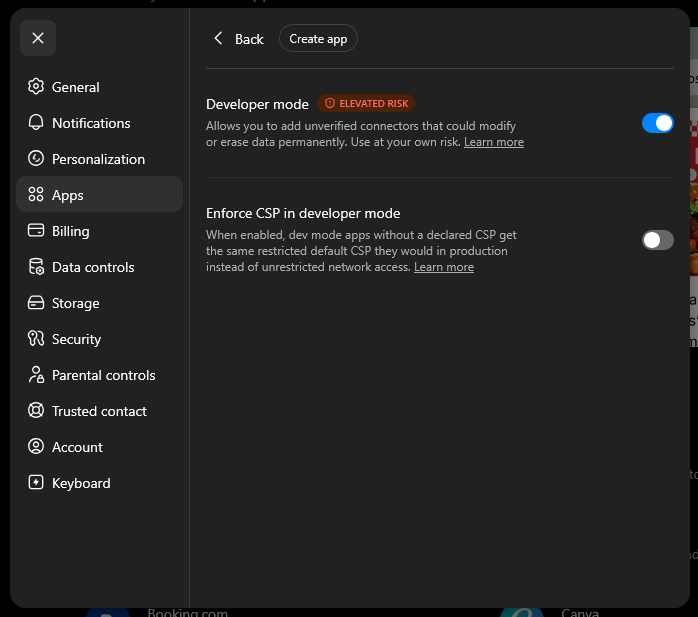
ChatGPT's Advanced Settings for Apps page with Developer Mode enabled -
Add "ExperiOps" as the name, and paste the connection address from above into the Connection field, and click Create.
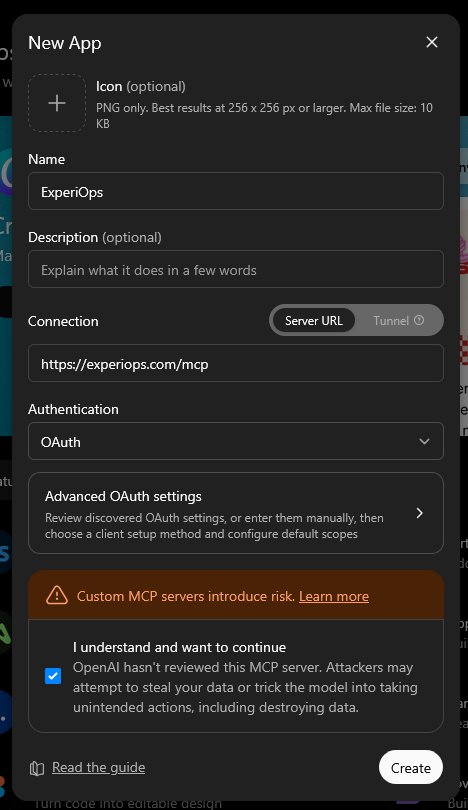
ChatGPT's "create app" window filled in - A page from ExperiOps may open asking you to log in and give your approval. Click Authorize.
- Done! ChatGPT can now help you fill in and submit your ExperiOps projects.
Need more help? See OpenAI's guide: Developer mode & custom connectors in ChatGPT.
- Look in your tool's settings for something called connectors, integrations, or MCP servers, and add a new one.
- Paste the connection address from above. If you're asked how to sign in, choose OAuth — a page from ExperiOps will open where you log in and approve.
- If your tool asks for a "token" or "API key" instead, go to your account settings, open Create a token manually under Connected agents, and paste the token it gives you into your tool.
An AI assistant can never connect to your account on its own. Connecting always ends with you logging in on ExperiOps and clicking Authorize yourself — if you didn't approve it, it isn't connected.
The assistant never sees or stores your ExperiOps password. When you approve a connection, it gets its own separate key that works only for the things listed on this page.
A connected assistant can see and edit your projects, and nothing else — it can't see other people's data, change your account details, or delete projects.
Assistants are told to always ask you before submitting a project for review, because a submitted project can no longer be edited.
Anything an assistant reads or writes on your behalf is covered by our privacy policy, just like everything else on ExperiOps.
You can cut off any connected assistant whenever you like:
- Go to your account settings.
- Scroll down to Connected agents — every assistant you've connected is listed there, along with when it was last used.
- Click Revoke next to the one you want to disconnect, and confirm.
The assistant loses access immediately. You can always reconnect later by following the setup steps again.